Delicious Cooking Recipes

Get Delicious Cooking Recipes Here For Free

Breaking

Tuesday, February 21, 2017

1:07 AM

Bibimbap ???

One of my favourite Korean food is Bibimbap ??? which is "Korean mixed rice with meat and assorted vegetables" and served with a sauce mix of gochujang. But I seldom eat it outside because most of the time the rice portion is very big and after mixing the meat and vegetables, the entire serving is too much for me to finish. I eat very little rice and would prefer more ingredients than rice :p

Last year when I went to Korea, I flew by Korean Air and for supper they served bibimbap in metal bowls!! I don't eat supper so skipped it. Most of the passengers took it and I could hear the entire plane went "tok tok tok tok" (sound of mixing rice and ingredients using the spoon) during meal service hour. It seriously sounded yummy and I regretted not eating it :(

During the trip, I had wanted to try authentic Korean bibimbap at one restaurant in Myeongdong that's highly recommended by many, but the HB didn't like bibimbap so I couldn't eat it until the last day at the airport where I finally ordered it at a foodcourt with many food choices. And during the return flight, bibimbap was served again for dinner and this time, it was a must to eat it!


Actually bibimbap is not difficult to cook, just that the ingredients are prepared/cooked individually and hence quite tedious especially if you use many ingredients. I usually stick to 5 or 6.

Typical ingredients include meat (shredded or mixed), mushroom, spinach, cucumber, zucchini, soy bean sprout or mung bean sprout, carrot, egg etc. I also noticed this ingredient called gosari or fernbrake which is a type of mountain herb/vegetable? I tried to look for it at supermarkets but couldn't find it. Stupidly forgot to search for it at the traditional markets like Gwangjang market as I was too overwhelmed looking at all the food stalls.

For Koreans, I understand that they sometimes use leftover banchan (side dishes) which is super easy coz it's a matter of mixing them up with rice :p

Anyways, here's my version. Since I'm the only one eating it at home and cooking one serving is silly or rather difficult, I usually prepare double portion and eat it over 2 days.


Bibimbap ???
(makes 2 servings) (reference from Korean Bapsang, Maangchi, My Korean Kitchen)

Ingredients
  • 100g cucumber, sliced into thin pieces
  • 40g carrot, shredded
  • 100g swiss brown mushroom, sliced
  • 120g soy bean sprout
  • 100g spinach, cut into small sections
  • 2 eggs
  • 120g cooked short grain rice
  • Cooking oil, sesame oil, salt, pepper, minced garlic (2-3 cloves), spring onion/chives
  • Sauce: 1 tbsp gochujang, 1 tbsp honey, 1/2-1 tbsp water, 1/4 tsp sesame oil, sesame seeds, spring onion/chives
Steps
  1. Cucumber: Sprinkle generous amount of salt over sliced cucumbers and set aside for 15 mins. Squeeze out excess liquid. Toss with 1/4 tsp minced garlic, 1/4 tsp sesame oil, pinch of salt and pepper.
  2. Carrot: Add some sesame oil to a frying pan, saute the carrot shreds for 1-2 mins, add pinch of salt and pepper. 
  3. Mushroom: In the same frying pan, add some sesame oil, saute the mushroom till soft, add pinch of salt and pepper.
  4. Soy bean sprout: Bring 2 cups of water to boil with 1/2 tsp salt. Add the bean sprouts and cook for 8-10 mins. Drain and squeeze out water. Toss with 1/4 tsp minced garlic, 1/4 tsp sesame oil, pinch of salt and pepper.
  5. Spinach: Using the same pot of water, blanch the spinach till just cooked, about 30 seconds. Drain and squeeze out water. Toss with 1/4 tsp minced garlic, 1/4 tsp sesame oil, pinch of salt and pepper.
  6. Eggs: Fry 2 eggs sunny side-up till egg whites just cooked and yolks still runny.
  7. Sauce: Combine all the sauce ingredients, mix well and sprinkle with sesame seeds and chopped spring onion/chives.
  8. Combine: Scoop 1/2 portion of rice into the middle of a bowl. Place the sunny side-up on top of the rice. Arrange 1/2 portions of the cucumber, carrot, mushroom, soybean sprout and spinach around and on top of the egg white. Sprinkle with sesame seeds and chopped spring onion/chives. Drizzle desired amount of sauce, mix well and enjoy. Repeat for the remaining portion. If storing in fridge, keep in airtight box and steam for 5-6 mins before eating.

Tuesday, February 14, 2017

7:45 AM

Rose-flavour Swiss Roll

Happy Valentine's Day!

After baking the Bandung Cupcakes with Rose Buttercream yesterday, I wasn't very satisfied with the overall taste and texture. My hb and kiddo had the same thoughts. Well, I guess my family still prefers more tender and moist cakes like Strawberry Shortcakes :p

Well, I'm not really prepared to bake any of my signature rainbow or ombre cakes today so decided to make swiss roll instead. Since I'm so into rose syrup, decided to add it to my usual Japanese-style genoise sponge. I don't know why but my preferred sponge cake is always the genoise sponge; somehow it turns out very well and I'm very comfortable using it for my layer cakes or in this case, swiss roll.


Adding rose syrup to the sponge cake creates a lovely pink hue which I adore :) Tender and moist cakes like swiss rolls are best paired with whipped cream or chantilly cream. I also added rose syrup to the chantilly cream and to further enhance the sweet look of the swiss roll, I used only strawberries (even though I bought kiwi and peach as well).


And finally adding some heart-shaped strawberries as decor, this swiss roll certainly looks too cute to eat!


Rose-flavour Swiss Roll
(makes one 10" x 12" swiss roll)

Ingredients

Rose-flavour genoise sponge cake
  • 70g top or cake flour (I use Nissen Violet flour)
  • 25g unsalted butter (use butter in lighter shades, avoid yellowish ones, I use President or Elle & Vire)
  • 75g caster sugar (I use Japanese Jyohakuto sugar which is more moist and finer)
  • 140g eggs (about 3 small)
  • 1 tbsp + 1/2 tsp fresh milk
  • 1 tbsp + 1 tsp rose syrup
  1. Preheat oven at 180 degree celsius, top and bottom heat (conventional). Line a 10" x 12" baking tray with baking parchment. Set aside.
  2. Sift flour 2 times. Set aside.
  3. Melt unsalted butter in a small pot set in simmering water (bain marie). Remove from heat and set aside to cool.
  4. Add sugar and eggs into a large mixing bowl, whisk lightly and place bowl in simmering water (bain marie). Whisk using sugar has melted and the mixture is hot to touch.
  5. Remove bowl from hot water, transfer to eletric mixer and beat the mixture at high speed until slightly thicker than ribbon stage (batter flows slowly and rest on top).
  6. Turn the speed to lowest and add milk to the batter, mix for 30 seconds.
  7. Add rose syrup to the batter, mix for 30 seconds.
  8. Add the flour in 2 additions, each time mixing for 15 seconds.
  9. Take out a scoop of batter, add it to the bowl of melted butter, mix until blended. Pour this butter mixture into the batter bowl. FOLD the batter gently until just incorporated.
  10. Pour batter into centre of lined baking tray, spread the batter using a scrapper to make sure it's even.
  11. Knock the tray a few times on kitchen counter and bake for 12 mins at 180 degree celsius.
  12. Remove tray from oven and let it cool for 5 mins.
  13. Remove cake from tray, place on wire rack. Place another wire rack on top of the cake, then turn the cake over to remove parchment paper. Turn the cake over again, cover with the paper and let it cool down completely before frosting.

Rose-flavour chantilly cream
  • 300g whipping cream
  • 100g mascarpone cheese
  • 1 tbsp rose syrup
  1. Whip cream and mascarpone cheese in an electric mixer till stiff peak.
  2. Add rose syrup and mix till well-incorporated.
 Assembly
  • Place the sponge cake on a large piece of parchment paper.
  • Using a sharp serrated knife, trim a bevelled edge of 45 degree at one of the 12" sides of the sponge cake.
  • Spread the chantilly cream onto the sponge cake, leaving 1-2cm gaps from the edges of the longer sides.
  • Place whole strawberries at about 1/3 width of the sponge cake (from the non-bevelled side).
  • Holding the parchment paper, roll the sponge cake to the direction away. Use a ruler or long knife to help tighten the roll at the end by tucking the ruler and parchment paper inwards.
  • Place the bevelled edge downwards and chill the roll in the fridge for at least 1hr.
  • Trim both ends of the swiss roll thinly using a hot serrated knife (dip and dry using hot water for neater cut).
  • Decorate as desired and serve immediately or slightly chilled. Cake cannot stay in room temperature for more than 20-30 mins, must be stored in fridge.
*I realised that I forgot to brush some syrup on the sponge before spreading the cream but it seems to be ok this time. Syrup - Mix 3 tbsp water with 1-2 tsp rose syrup.
*This cake is best served slightly chilled. If chilled overnight, thaw for about 10 mins before eating to enjoy the soft and light texture of the cake. If eating directly from fridge, the cake texture will be slightly harder. 


Didn't manage to take work-in-progress photos except for one, because I still had to prepare dinner and thus rushing through).

Actually the cake wasn't perfect, some parts of it cracked a bit when I was rolling :( But the beauty of roll cake, I can try to hide the cracked parts at the bottom :p


Anyways, I love this swiss roll! Texture-wise, definitely what my family likes, very tender and moist. Taste-wise it has a subtle hint of rose-syrup and not too sweet. The hb and kiddo approve!


This recipe is a keeper for me, but I gonna practise the rolling part more to prevent cracks next time :)

Overall, very pleased with how the cake turns out. This swiss roll certainly makes it a more lovely and romantic Valentine's Day :)

Monday, February 13, 2017

5:08 AM

Bandung Cupcakes & Rose-syrup Buttercream

 All you need is Love... and cupcakes to get rid of Monday Blues!

I thought of making these sweet-looking Bandung Cupcakes with Rose-Syrup Buttercream because hb and the kiddo love rose-syrup drink and we always have a bottle at home. Kiddo calls it "delicious drink". Personally I like bandung drink, but don't drink it often since it's so sweet and fattening :p

Anyways, I thought these adorable petite-size cupcakes are quite apt for Valentine's Day as well, which is tomorrow!


The cupcakes are baked using a basic vanilla cupcake recipe, just that instead of milk and vanilla extract, bandung drink is added. As for the frosting, initially I thought of my favourite chantilly cream with some rose syrup, but because I'm packing the cupcakes as a snack for the kiddo's recess, I reckon buttercream would last longer at room temperature than chantilly cream. And to make the cupcakes look even sweeter, I stamped cutesy little hearts out of strawberries and topped them onto the frosting.

 
For buttercream, I was considering between Swiss or Italian and in the end went for the Italian Meringue Buttercream that's used by the Koreans for their glossy buttercream flowers. I reckon I could make a bigger batch, freeze and practise on some Korean buttercream flower piping when I have more time.


Bandung Cupcakes and Rose-Syrup Buttercream
(makes 12 petite size cupcakes)

Ingredients

Bandung Cupcakes
  • 90g cake flour
  • 1/2 tsp baking powder
  • 1/8 tsp fine salt
  • 60g unsalted butter
  • 80g caster sugar
  • 1 egg
  • 1/2 cup bandung drink (100g fresh milk + 2 tbsp rose syrup)
Steps
  1. Preheat oven to 180 degree celsius, top and bottom heat. Prepare a 12-hole muffin tray and line with cupcake cases. Set aside.
  2. Sift cake flour, baking powder and salt together. Set aside.
  3. Beat butter and sugar using an electric mixer on medium speed for about 5 mins, stopping to scrap the bowl as necessary, until creamy and fluffy.
  4. Add the egg and beat till well-mixed.
  5. Add flour mixture in 3 additions, alternating with the bandung drink. Mix till just blended.
  6. Using an ice-cream scoop, add the batter to the cupcake cases, to about 2/3 full.
  7. Bake at 180 degree celsius for 15 mins.
  8. Let the cupcakes cool completely before frosting.
Rose-syrup Italian Meringue Buttercream
(reference from Korean Decorating Art recipe book, makes more than enough to frost the cupcakes)
  • 2 egg whites (about 72g)
  • 30g caster sugar
  • 60g caster sugar
  • 25g water
  • 225g unsalted butter, cold and cubed
Steps
  1. Beat egg whites with 30g caster sugar using electric mixer, till peak stage.
  2. Meanwhile, add 60g caster sugar and 25g water to a heavy saucepan, bring to boil till 120 degree celsius.
  3. Turn the electric mixer to lowest speed and add the syrup to the meringue in a steady stream.
  4. Whisk the meringue at high speed till the meringue cool down to room temperature.
  5. Place the whole bowl of meringue into the fridge to chill until temperature reaches 10 degree celsius or lower.*
  6. Place the bowl back to the electric mixer at medium speed, add butter piece by piece and then beat on high speed till well-blended and buttercream is formed.
  7. For frosting of the cupcakes, mix 100g of buttercream with 2 tsp of rose syrup, stir till well-mixed.
  8. For remaining buttercream, store in fridge for 1 week or freezer up to 3 months.
* The lower the temperature of meringue, the buttercream will turn more glossy.


It's all pinkish cuteness overload and lovey-dovey looking, isn't it?

The cupcakes smell really good, just like rose syrup. Taste-wise it's not as strong as bandung drink but the rose scent is rather distinct. I must say not bad at all!

Will add this cupcake flavour to my order list; if anyone's looking for pink cupcakes, this is the one to go for :)

Tuesday, February 7, 2017

6:54 AM

Teddy Bear Cookies

Valentine's Day is just one week away! And today I'm in the mood for some love in the form of these adorable Teddy Bear Cookies \(*o*)/

I hardly ever bake cutesy character cookies because I don't eat much cookies in the first place. But I thought the kiddo might appreciate it :)


Baked just a small quantity of twelve pieces in four flavours, original, chocolate, matcha and yam. I thought stamping a heart in the teddy and filling it with some candy makes the teddy look so sweet :)


Wanna join them in a garden tea party?

The trio spreading their love :)

Just one sweet teddy bear is enough for me :)

The cookie is actually easy to make, just a bit tedious as I wanted to have four flavours/colours. If making just one or two flavours, should be quite straightforward.

After combining and sifting cake flour, icing sugar and salt, I divided the mixture into four portions, and added the different flavours accordingly. I bought the matcha and yam powder from a Japanese food fair at Isetan sometime ago; the cocoa powder is Valrhona, my favourite brand of baking/cooking chocolate.

Next add cold unsalted butter to each portion, and rub the butter into the mixture till crumbly. Add egg and bring the mixture together with a spatula till it forms a dough. Do not knead or overwork the dough.

Place the each ball of dough in between 2 layers of plastic sheet, roll into 4-5mm thickness and place in fridge to chill for at least 30 mins.

Using a cookie cutter, stamp the cookie dough and place the dough onto a baking tray lined with baking parchment or mat.

For leftover dough, gather (do not knead), roll into 4-5mm thickness again and place back to the fridge to chill until firm (about 15-30 mins). Stamp using cookie cutter again. For remaining scraps, stamp into tiny hearts and stars till all dough used up.

Notice the crescent-looking bits of dough? Initially I wanted to stick them at the back of the teddy bear so that they can hang on the edge of a mug. I ran out of time to make the holder firm enough so scrapped the idea.

Bake in pre-heated oven at 170 degree celsius (fan mode) for 10 mins. Remove the tray and add crushed hard candy into the stamped heart, then continue baking for another 5-6 mins.

Let the cookies cool down completely.

Decorate the cookies using deco pen or melted chocolate. Store in airtight container.

Teddy Bear Cookies
(makes 12 pieces)

Ingredients
  • 210g cake flour
  • 45g icing sugar
  • 1/4 tsp fine salt
  • 2 tsp cocoa powder
  • 1.5 tsp matcha powder
  • 1 tsp yam powder
  • 100g cold unsalted butter, divided into 4 portions of 25g each
  • 1 large egg, about 56g, divided into 4 portions of 12-13g each
Steps
  1. Sift cake flour, icing sugar and salt into a bowl. Divide the mixture (about 256g total) into 4 portions of 63-64g each.
  2. Add the cocoa, matcha and yam powders into 3 of the portions respectively (1 portion is original flavour). Mix until well-combined.
  3. Add cold butter into the 4 flavour portions respectively. Rub the butter into the mixture till it is crumbly. 
  4. Add egg into the 4 flavour portions respectively. Use a spatula to bring the mixture together until it forms a dough. Do not knead or overwork the dough.
  5. Place each ball of dough in between 2 layers of plastic sheets. Roll the dough into 4-5mm thickness. Chill the 4-flavour/sheets of dough in fridge for at least 30 mins.
  6. Preheat oven (fan mode) at 170 degree celsius.
  7. Take out the sheets of dough, use a teddy bear cutter to stamp the dough (2 teddy bears per dough). For remaining dough, gather (do not knead), roll and stamp 1 more teddy bear.
  8. Use a mini size heart-shape cutter to stamp the middle of 5 teddy bears. Place the cut-out hearts onto the other 5 teddy bears. For scraps, stamp into mini hearts and stars until all dough used up.
  9. Place the teddy bears, hearts and stars onto a baking tray lined with parchment or mat. 
  10. Bake at 170 degree celsius (fan mode) for 10 mins. Remove tray and add some crushed hard candy into the stamped heart of the teddy bears.
  11. Return tray to oven and bake for another 5-6 mins.
  12. Let the cookies cool completely.
  13. Decorate the cookies with melted chocolate or deco pen.
So sweet that I can't bear to eat the bear. *pun intended.

But the kiddo just munched and chomped the cookies like nothing. And he already requested to bring four pieces to school for his snack.


Meanwhile, let me indulge in some food porn.

Cuteness overload yet?

Friday, February 3, 2017

11:44 PM

Kansai Feb 2016 Highlights Part III - Kitano Tenmangu

Continued from
Part I - Stay at Kyoto
Part II - Fushimi Inari Taisha


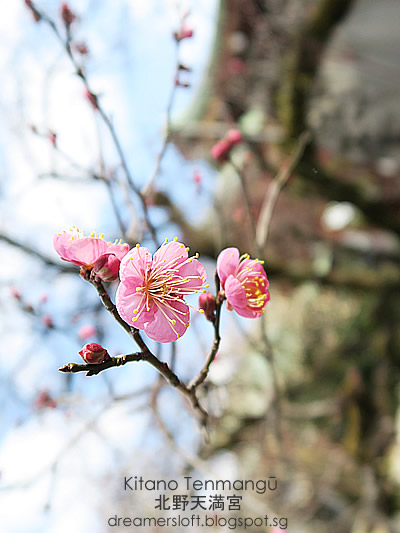
For this trip to Kansai, I had planned for Plum (Ume) Blossom viewing because I roughly know that it's during the February period, but we might be a tad too early as plum blossoms typically bloom from mid Feb onwards till Mar, before the Cherry Blossom.

Luckily I came across an article about Ume Blossom at Kitano Tenmangu Shrine in Kyoto and their FB page announced that some of the ume blossoms had started to bloom and others budding.


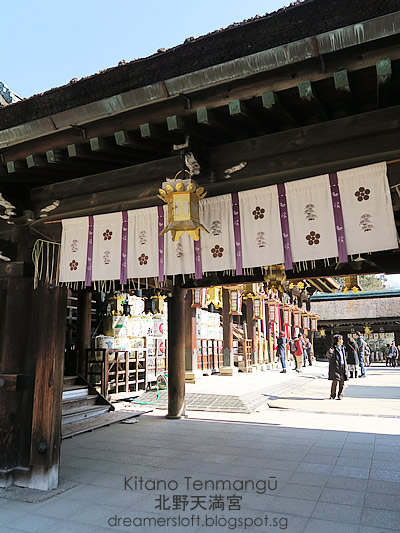
Kitano Tenmangu Shrine is built over 1000 years ago, in honour of Sugawara no Michizane, a scholar and politician who is known as "god of agriculture", "god of honesty and sincerity", "god of dispelling false accusations", "god of performing arts" and most importantly, "god of academics". Many students would visit the shrine during the examination period to pray for good passing scores and improvement of their abilities.


Kitano Tenmangu features a grove of almost 2000 ume trees inside the Bai-en (ume garden) which is open to the public for a fee of 700 yen.

When we reached the shrine, we decided to walk around the grounds first (free) before entering the Bai-en. As we strolled, we realised that there are plenty of ume trees scattered around the shrine and enough to satisfy our viewing actually. So we found that it's not necessary to pay the additional entrance fee to enter the Bai-en.

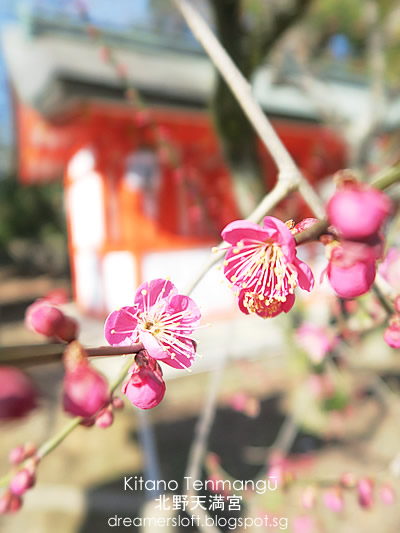
The plum blossoms were so pretty, comparable to cherry blossoms if not prettier. It's so understated! I mean, why is everyone focusing only on cherry blossom? Perhaps the cherry blossom has always been widely publicised with more commercial connotations. Anyways, I love them both. How I envy people staying in temperate countries like Japan and Korea where flowers bloom and trees change colour according to seasons.


We spent a couple of hours at the shrine, admiring the beauty of the ume. Understand that the shrine also hosts a special tea ceremony called the Baikasai in the Bai-en every 25th Feb, attended by maiko and geiko from the nearby Kamishichiken geiko district.

And on the 25th of each month, a flea market is held at the shrine and surrounding streets with hundreds of vendors selling antiques, crafts, art, plants, toys, as well as food stands selling street food like takoyaki, yakisoba and more.

Too bad we missed these festivities. Next time, hopefully.

Stay tuned for upcoming Part IV - Nishiki Ichiba Kyoto, Kuromon Ichiba Osaka


Thursday, February 2, 2017

7:03 PM

Kansai Feb 2016 Highlights Part II - Fushimi Inari Taisha

Continued from
Part I - Stay at Kyoto


Fushimi Inari Taisha (??????) is a must-visit place for me this trip. Previously we had always went to Kiyomizudera, Kinkakuji, Ginkakuji, but missed out on Fushimi Inari, or rather I didn't know about it until the recent years.

I learnt that Fushimi Inari is an important Shinto Shrine in southern Kyoto, famous for its thousands of torii gates, leading into the forest of Mount Inari.


The shrine is dedicated to Inari, the Shinto god of rice and as foxes are thought to be Inari's messengers, there are many fox statues around the grounds of the shrine.

The day we went to Fushimi Inari was 3 Feb, which happened to be Setsubun (??) meaning "Seasonal Division", signifying the beginning of spring. At Buddhist temples and Shinto shrines, there will be a special ritual called mamemaki (???) by the Priests and invited guests where they would scatter roasted soybeans called "fortune beans" (?? fuku mame). This is said to cleanse all the evil of the former year and drive away disease-bringing evil spirits for the coming year.

So we witnessed the ceremony and people were all trying to catch one of these little bags of fortune beans :)

These lovely ladies in Kimonos were the invited guests to help scatter the fortune beans.

The Priests who were administering the ritual.

Map of Fushimi Inari. It would probably take an hour or two to climb all the way to the summit.


The torii gates are located behind the main grounds of the shrine. It was really crowded with narrow paths and impossible to take any photos without the large crowd photobombing.

But we walked further and further, the paths became more spacious and the crowd dispersed considerably.

The right side of the torii gates indicate the year and month the gate was constructed.


Here's the donation chart if any company or individuals wish to erect a torii gate for blessings.

It felt serene to walk through rows and rows of the vermilion torii gates, where there was no crowd and the air was cold and crisp.

Names of the company or individuals who made the donations were imprinted on the left side of the gate.


Ema ?? (??)
It's common to see this in Shinto Shrines, where temple goers could write wishes on a piece of wood and hang it up for blessings and pray that the wishes would come true.


As we walked further uphill, could see that the torii gates looked older and more spaced out.


Finally we arrived at an area where we could enjoy some udon and inari sushi, but the eateries were all closed :( Not sure if it was because of the Setsubun or they only open during weekends?

The kiddo was complaining of hunger and we were pushing him to keep climbing for the udon. Oh well.


Decided to turn back downhill via another route and to our delight, we found an eatery on the way down :)


Yay, and we enjoyed our well-deserved inari udon and oden udon after one and a half hours of uphill hiking.


The best was yet to come because upon exiting the shrine, we saw an open-air food street to the right of the shrine, along with some shops. Yay, time for more food and shopping! Not sure if the food vendors were permanent or only during festive seasons?


Cold weather called for meat! This yakitori with a sticky sweet teriyaki sauce was sooooo yummy!


Takoyaki, also perfect for the cold weather!

Tempted to try the Okonomiyaki but the portion was too big.


Grilled beef! Unfortunately the cut was of lower quality and the meat too tough.


OMG! This grilled bacon with mayonnaise was da bomb! The pork was salty and greasy, smelled and tasted so good!

This grilled sweet potato coated with sugar was super yummy as well, and we just had to get seconds.

Overall, the Fushimi Inari Taisha was a lovely shrine to spend the morning, be sure to walk further uphill to get away from the crowd and truly enjoy the peacefulness of the mountain. Thereafter, it's befitting to enjoy a nice hot bowl of inari udon or some street food to complete the experience.

Stay tuned for Part III - Plum Blossom viewing at Tenmangu Shrine.